Free beginner build guide
Simple Wall Shelf: DIY Woodworking Plan & Free Cut List
One pine board, two cuts, and an afternoon: this beginner-friendly wall shelf uses a straightforward cut list, common tools, and eight clear steps. Written by this site as a generic starter design — not from any paid plan library.
Affiliate disclosure: This page contains an affiliate link. We may receive a commission if you purchase through our link, at no additional cost to you.
Affiliate Disclosure
This page contains affiliate links. If you purchase TedsWoodworking through our link, we may receive a commission at no additional cost to you. This page is an independent affiliate information/review page and is not the official TedsWoodworking website. Please visit the official offer page for the most current product details, pricing, terms, and availability.
Overview
What You'll Build
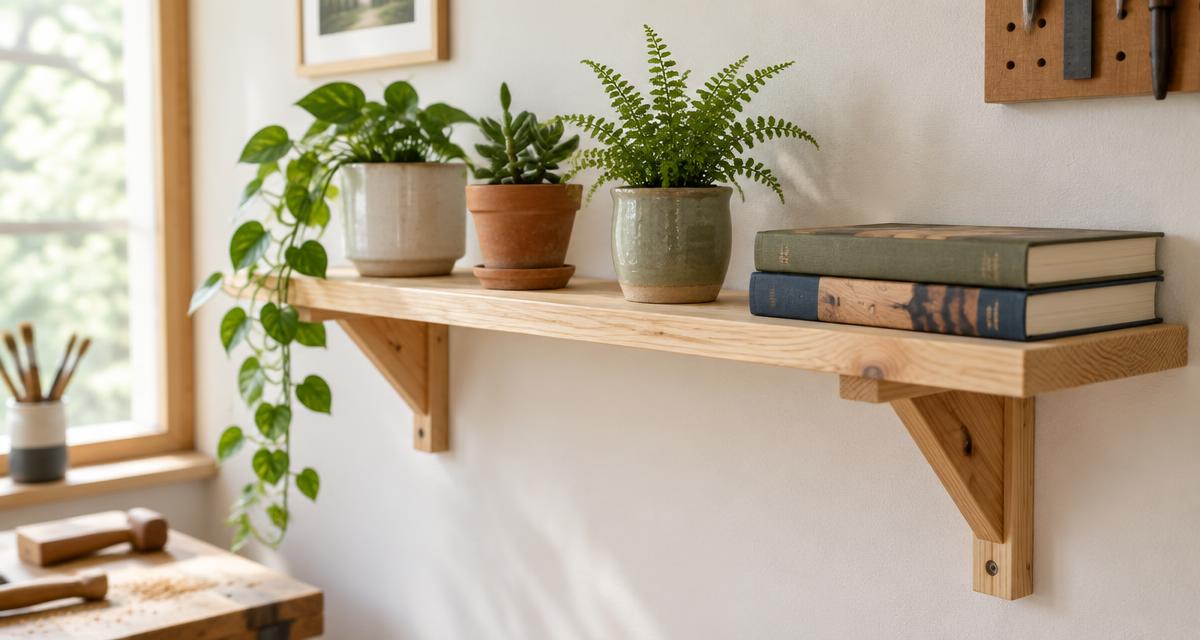
A 24 in wall shelf on two angled wooden braces — enough surface for plants, books, or kitchen jars, and a real lesson in measuring, straight cuts, and anchoring into a wall.
Finished size
24 in long × 7¼ in deep × roughly 5 in tall, depending on how far up the brace legs the screws sit. Tip: "1×8" pine is a nominal size — the actual board measures ¾ in thick × 7¼ in wide.
Skill level
Beginner. Every joint is a simple screw joint, there are only straight and 45° cuts, and a mistake on scrap pine costs little. Take the safety notes seriously — saws and drills do not forgive shortcuts.
Cut list
Cut List
| Part | Qty | Size | Notes |
|---|---|---|---|
| Shelf board | 1 | 1×8 pine, 24 in long | Actual board size: ¾ in thick × 7¼ in wide |
| Brace blanks | 2 | 1×8 pine, 7¼ in × 7¼ in squares | Cut each square corner-to-corner into two 45° triangles — this yields four triangles; use two, keep two spares |
Shopping
Materials
- One 1×8 × 4 ft common pine board (covers the shelf and both brace blanks)
- Four #8 × 1¼ in wood screws (shelf to braces)
- Four 2½ in wood screws if mounting into studs, or heavy-duty wall anchors sized for your wall type
- Wood glue (optional, for the shelf-to-brace joints)
- Sandpaper: 120 and 180 grit
- Finish of your choice: paint, stain, or wiping oil (optional)
Workshop
Tools
- Saw: circular saw, miter saw, or a hand saw with a miter box
- Drill/driver with pilot and countersink bits
- Tape measure, pencil, and combination square
- Level
- Stud finder (or use wall anchors rated for your wall)
- Safety glasses and hearing protection
Build
Step-by-Step Instructions
Work through the steps in order. If any step feels unclear, stop and check a trusted technique guide before cutting or drilling.
Measure and mark
Mark a 24 in length on the 1×8 board and two 7¼ in squares on the remaining stock. Measure twice before cutting, and check the board for bows or splits before you buy it or cut it.
Cut the shelf and brace blanks
Cut the shelf board and the two squares. Support the offcut side as you cut so the board does not pinch the blade or splinter as the cut finishes.
Cut the diagonals
Draw a corner-to-corner diagonal on each square with your square and pencil, then cut along the line. Each square becomes two right triangles; you need two triangles for the braces.
Sand everything
Sand all faces and edges with 120 grit, then 180 grit, easing the sharp corners. Wipe off the dust before finishing.
Finish before mounting (optional)
Paint, stain, or oil the parts now. Finishing before assembly is easier and gives a cleaner result on the hidden faces.
Mark the wall and find fixing points
Hold a level and draw a light pencil line where the shelf will sit. Locate the studs and plan to anchor each brace into one. If no stud is available where you want the shelf, use heavy-duty anchors rated for the load — never plain plastic plugs for anything heavier than light decor.
Attach the braces to the wall
Drill pilot holes and drive a 2½ in screw through the vertical leg of each brace into the stud or anchor. Check with the level that both braces sit at the same height and the vertical legs are plumb.
Mount the shelf
Rest the shelf on the braces. Drill pilot holes and drive a #8 × 1¼ in screw up through the brace top and into the underside of the shelf at each brace, optionally with a little glue. Add a second screw at each brace if the shelf will carry anything more than light decor.
Safety Notes
- Wear safety glasses while cutting and drilling; use hearing protection with power tools.
- Support the workpiece fully when sawing so the cut cannot pinch or kick back.
- Check what is behind the wall before drilling: wiring and pipes do not mix with screws.
- A wall shelf is only as strong as its anchoring. Load it lightly at first and never stand on it.
- Follow your tools' manuals and local practice; this guide is general information, not professional advice.
Keep going
After Your First Build
Once the shelf is up, you have practiced the core loop of woodworking: measure, cut, assemble, finish, mount. More beginner woodworking projects build on those same skills, and cutting boards, planter boxes, and picture frames are natural next builds.
If you want a large library of designs to browse instead of one-off plans, the official TedsWoodworking offer page describes its plan collection in detail — check the current terms there before buying, or read our full TedsWoodworking review.
FAQ
Wall Shelf Questions
Ready to Build Something Real?
Start with this shelf this weekend — then explore the plan collection and decide whether it fits your next project.
Affiliate disclosure: This page contains an affiliate link. We may receive a commission if you purchase through our link, at no additional cost to you.